
How to lay weed membrane
Laying weed membrane has many benefits, but to get the best results there are a few steps to follow. Here, we guide you in how to lay weed membrane like a professional. The weed suppressant fabric must be flexible and permeable to let rainwater through, but dense enough to suppress weeds. Needle punched, non-Woven, geotextile matting is the best material to use. If you want to maximise the effectiveness of your weed matting to withstand the test of time, then read on.
How to lay weed mat around existing plants
Getting a weed control mat to fit around plants can be a challenge. However, with our professional insights fitting weed matting will become straightforward.
Follow the three-stage process below to lay weed control matting around multiple existing plants:
-
Cut squares of weed mat - these need to be 10% bigger than the spread of the plant it is going under. Making a cut into the centre from a corner will allow you to fit the weed mat under the plant. It may be necessary to make extra cuts to route branches through the mat. Repeat the process for all plants, avoiding over cutting or making penetrations in the matting that are bigger than they need be.
-
Cover the remaining exposed areas - with stage one complete, exposed soil will remain between plants. Next, use the largest sized sheet possible to cover multiple gaps in one go. The aim of this is to reduce the number of joins between pieces of weed mat. Joins are the vulnerable areas where gravel or mulch can get under the matt pushing it up and making it unsightly.
- Secure joins and overlaps - they are potential weak points that weeds can exploit. Once you have completly covered the area, joins should be secured with Gaffer tape, or specialist adhesive. This is imperative, as the join is where weeds will attempt to grow through.
Can you lay paving slabs on weed membrane?
It is useful to know when and how you can lay paving slabs on weed membrane. Professional landscapers often use a weed mat as a semi-permeable membrane. This will allow moisture to move through, while blocking gravel and weeds, protecting a sub-grade level under the foundations of the paving. Typically, non-woven geotextile material is used for this purpose, which would also act as a weed membrane.
Where there is a need to block more persistent or invasive weeds from paving, a root barrier may be more appropriate. Permeable or non-permeable root barriers can be purchased, which have the qualities of a weed mat. They are more robust and able to block invasive bamboo, Mare's tail, Japanese knotweed and other invasive species.
For domestic gardens, laying paving slabs on weed membrane is perfectly possible.
- First, rake out the area below the slab, getting it to the correct level and height.
- Next, compact the the ground.
- Then, lay your weed matting.
- If needed, you can use some sand as a bedding to further level the slabs before-laying them.
This process of using weed membrane and paving is great for stepping stones and Mediterranean gardens where gravel, stones, and paving work together.
Can you lay turf over weed control fabric?
You can lay turf over weed control fabric. The turf will seek to root through the weed control fabric, and this will happen within a week or so. The weed mat will only suppress weeds below, therefore weeds within the turf and the seeds of windblown weed will continue to grow.
Laying weed membrane over grass is not recommended. Weed control fabric is not suitable for this use. The matting will kill off the grass, which may not be the desired result
Can you lay weed membrane over gravel?
Any gravel purchase is, unfortunately, likely to already have weeds present. However, you may wish to use a barrier to block or suppress unwanted plants from growing. For this application, it is best to use a black, non-permeable root barrier as it would block light and limit water.
Some have concerns that the application of gravel may puncture the barrier. A layer of protection can be provided using sand; however, this will contaminate the gravel. Laying a secondary fleece under the root barrier provides a better option.
Sand can be used to weigh down both weed control fabrics once in place. This solution could be employed temporarily (for one or two seasons), to kill off persistent weeds. However, the level of success acheived will be dependent, in part, on the type of weeds being surpressed. Request specialist advice if unsure.
Laying weed membrane
A complete 20 point guide to installing weed control fabric the right way.
- Measure the area to determine the quantity of weed control fabric required. If needed, break up complicated shapes into rectangles and squares. Don’t worry about overlap.
- If you are fitting barrier to an existing bed allow extra matting for each shrub (see above). Allow for wastage and overlap.
- Use a material overlap of 100mm (minimum) - recommended. By using a specialist adhesive, the overlap can be reduced to 50mm. Allow for between 10% and 20% extra weed membrane for overlaps and wastage.
- Find a supplier who has the required weed mat size in stock. Remember, you will need a little more for wastage, but don’t be wasteful.
- Place an order for your weed mat so that it can be with you when you, or your team, are ready to start the work.
- Place an order for your loose covering material, e.g. gravel, bark, mulch. You can normally buy this loose in lorry loads, bulk bags or small retail bags. It’s important to consider the logistics of the project, order your loose covering material in a format that’s going to minimise manual work.
- Ensure that you have the correct tools. We suggest a spade, fork, rake, scissors, knife, marker pen, adhesive, heavy blocks, or bricks to temporarily weight down your matting.
- Start by raking out the ground levelling the area with a rake. Evenly contour the ground by pushing high points into the low troughs.
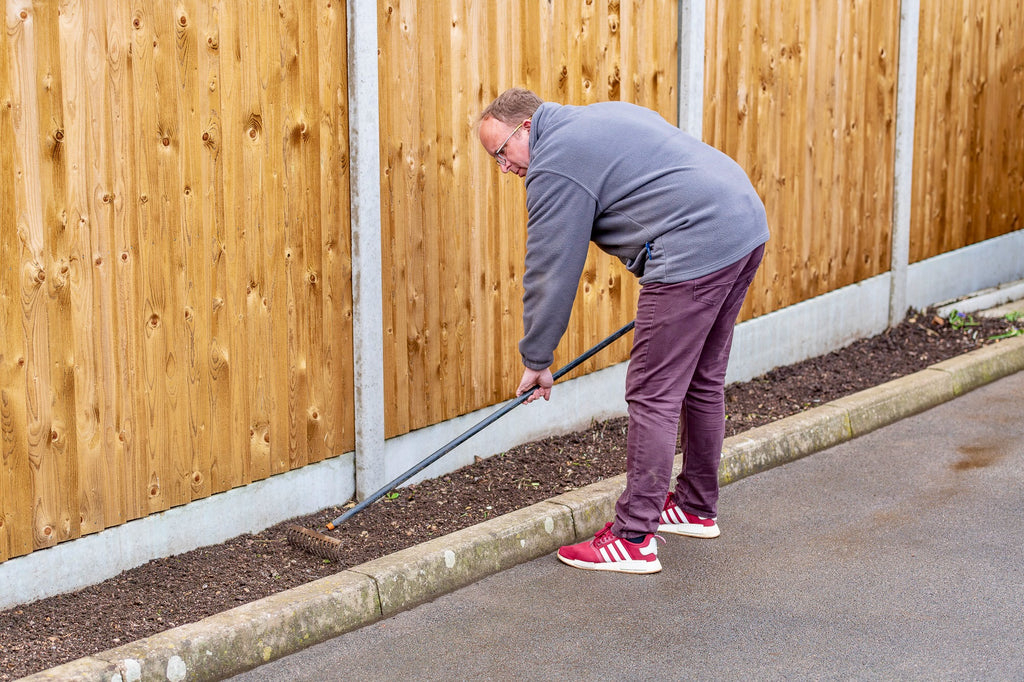
- Ensure that the perimeter is lower than surrounding surfaces and can take the desired depth of mulch or gravel.
- Prepare your area getting rid of litter, sharp objects, and weeds before laying weed control fabric.
- Create a gutter at the edges - this is critical if you want the finished area to look as good for the long term. The gutter will be used as an overflow for the top layer of bark, compost or gravel when it is disturbed. Pets, wind, rain, and wildlife can create disturance, causing the loose layer above the weed mat to be spread over paths, patios and lawns. A gutter perimeter of 50mm-75mm lower than the surrounding area is required to accomodate this loose material.
- Rake any excess surface material (soil or other) from the gutter into the central area. Level this but ensure that the gutter remains.
- Now you can start laying out your weed mat. Aim to cover as much ground as possible without cutting the weed mat. Wherever possible, align the material to any straight edges for speed, and to avoid wastage.
- Extend the barrier past other surfacing or edgings around the perimeter. Cut excess material later. Spread the loose covering before any trimming takes place. The loose covering will weigh down the weed membrane causing it to move. Some extra loose material will help along the perimeter, to prevent gaps forming when the membrane turns upward at any edging or paving. Stick down the material if required. Use a specialist adhesive to adhere it to any structures the weed mat abuts.
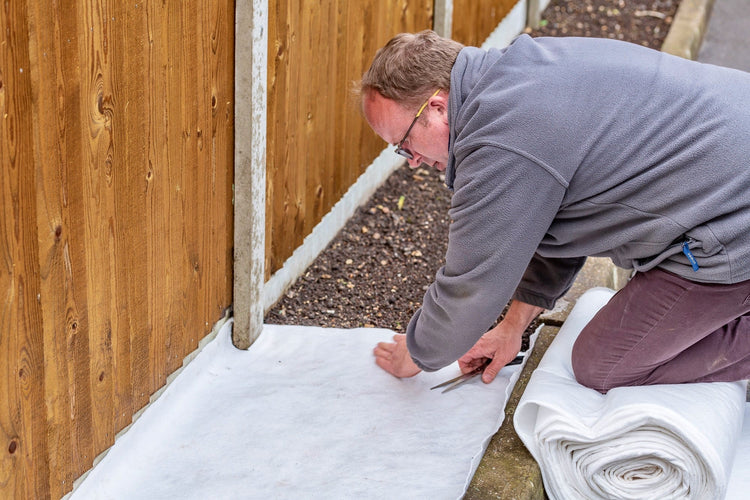
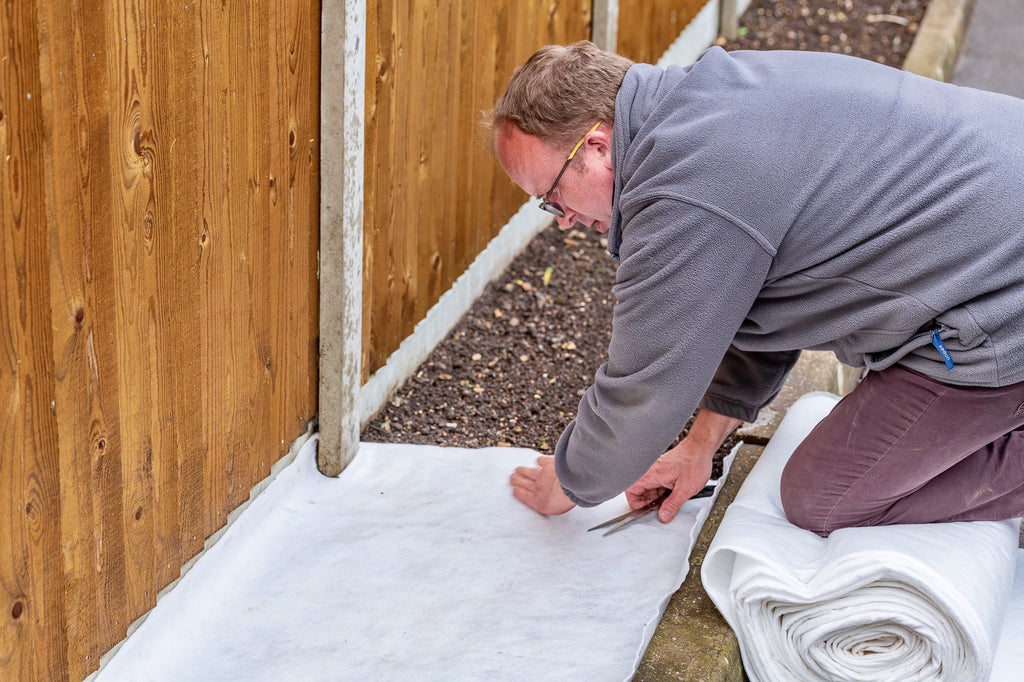
- It’s normal to lay weed matting in sections, so when you’re ready start cutting the barrier. Weight down the barrier with blocks, bricks or some of the loose covering to keep each section aligned.
- Cut the matting with scissors, in this instance it is more accurate than a knife. When cutting up to edges it often pays to mark the weed matting with a pen so that you cut accurately.
- Complete any jointing required by one of two recommended methods. Use specialist adhesive, which is probably the best method for durability. Alternatively, use a specialist joining tape 150mm wide.
- When fitting weed membrane around existing plants, follow the steps previously outlined (see above).
- Now, you can lay your gravel or mulch with the weed mebrane securely in place. Make sure you have enough to fully cover the weed matting.
- After spreading the loose material, trim the edges and remove any unwanted exposed weed mat material.

Additional points to consider when laying weed control fabric
When planting, you can make holes through the weed control membrane; however, if the whole or cut is too big it will be a weak point for weed growth. Use small small squares of weed matting doubled-up in these locations. You can use specialist adhesives to stick these squares to the main weed matting.
Weed matting is permeable, and does not block 100% of weeds, therefore some maintenance is inevitable. Trapped, wind-blown weed seed within the loose material may well germinate on top of the barrier. Using a bark type material will make this more likely.
Consider using adhesive to secure weed matting to edgings and paving. This will help stop weeds coming up at the edges of the area.
Use camping pins on sloping ground to secure weed membrane. Remember that on steep banks the loose material may slip and expose the weed matting. Where this is a concern, terracing the area may be the only option to deal with steep banks.