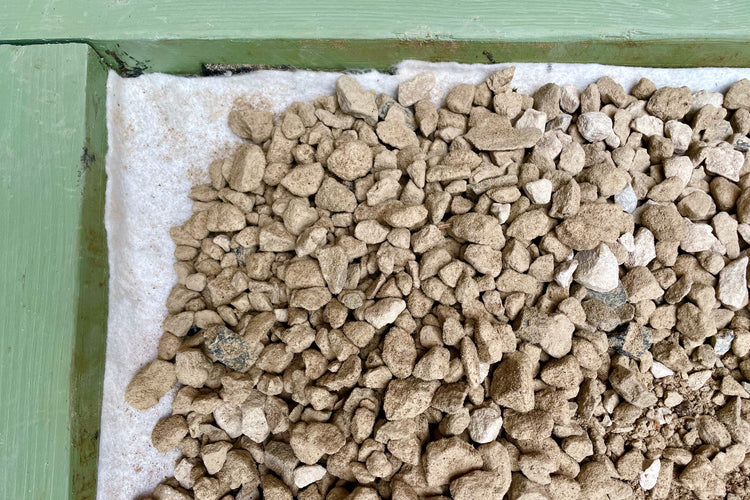
Adding gravel to your outdoor space might seem straightforward, but installing a heavy duty membrane for gravel is an important consideration. This guide explains how to lay heavy duty weed membrane under gravel effectively, and includes an instructional video.
Before looking at the process of how to lay membrane for gravel, we need to address some key questions. First, we will answer the question, ‘do I need a membrane under gravel?’ While the answer may appear to be obvious, it’s essential to understand the reasons for using a membrane for under gravel. We will also look at selecting the best membrane: crucially, a heavy duty membrane is necessary for gravel.
Do I need a membrane under gravel?
Using a membrane under gravel is highly advised to prevent weed growth and to stabilise the gravel. Membranes are simple to install and ensure low maintenance weed control, making them an important asset for your landscaping projects.
Without membrane, the gravel will sink into the ground and become more easily displaced. This will lead to you needing to replenish it more often. Moreover, with no membrane, weeds can establish deeper roots in the soil, making them harder to remove. Even if weeds manage to grow above the membrane, they will be much easier to remove because their roots will be less extensive.
Selecting a membrane for use under gravel
It is important to choose the right kind of geotextile membrane for use under gravel. Opt for a heavy duty membrane for gravel, thick enough to withstand the sharp edges of gravel without damage. Our WeedSecure Pro, a permeable, heavy duty weed membrane, is perfect for this purpose and available at Root Barrier Store.
Read more about the different types of geotextile membrane in: 'What is geotextile material?'
How to lay membrane for gravel
Alongside this written guide, our video demonstrates how to lay membrane for gravel in just a few simple steps. You will see the preparation needed, and how to lay weed membrane under gravel professionally.
Preparing the surface
Start by preparing and levelling the surface of your chosen area. If you are working with a larger area, it is helpful to use mechanical assistance to evenly contour the ground, pushing high points into the troughs. For smaller areas, dig and level the surface manually with a shovel. It’s also best to finish any size area manually, to provide an opportunity to remove any final stones or sharp objects, ready for the weed membrane to be installed.

Measuring and cutting the weed membrane
With the ground prepared, measure the weed membrane using a tape measure and a marker pen for accuracy. When you measure, be sure to allow for between 10% and 20% extra weed membrane to enable overlaps and wastage.
If the areas you are working on have a complicated shape, break these up into rectangles. Allow for a material overlap of 100mm minimum, and use a barrier adhesive to join the pieces if required.
Laying the weed membrane
The next step is laying the weed membrane in the area you have dug and levelled. Ensure you create a material upturn whenever the weed membrane meets an upward surface. You are, in effect, creating a material tray that will hold the gravel. This will keep the area tidy, and prevent any weeds growing at the edges if gaps remain at a minimum.
Preparing to lay the loose surface material
With the weed membrane successfully installed, you now need to prepare the area ready to lay the gravel on top. Use visual markers to help you gauge the depth of material required. A spirit level and string will help you create a level perimeter and mark out the area.
In our video, we are use tough, trade quality weed membrane. Even so, when using machinery to bring in the gravel or other covering material, we recommend that you lay track mats to protect the membrane from damage.
Laying the surface material
Prior to starting the project, you’ll need to think about access to the site if machinery is required. Select an area where the gravel can be stored until you are ready to use it, and also somewhere it can be conveniently transported.
Make sure you measure access space in advance to ensure dumpers and mini diggers required measure less than the width of the access pathway. With your surface material accessible and ready to go, you can pour it onto the weed membrane. Manually spread the loose material across the surface of the membrane using your shovel.

Once the surface material is in place, and with the membrane weighed down, you will have a clearer indication of the membrane overlap remaining at the edges. Trim the excess material, ensuring that the tray-like structure remains to hold the loose material. If you cut away too much, as with if you don’t allow enough overlap initially, weeds can grow where the membrane hits the boundary.
After trimming the membrane, use a shovel or the reverse of a rake to push the loose material to the edge of the barrier. To help you trim trickier areas, pull the excess weed membrane back and mark it, then cut the excess. This more accurate measuring, marking and cutting means you’ll end up with the weed mat barely visible at the edges.

With your project complete, the heavy duty weed membrane and gravel in place, you'll be ready to enjoy your transformed outdoor space. If you've found this guide to laying heavy duty membrane for gravel useful, take a look at our other installation guides.
If you need to purchase materials for your upcoming project, view all products.

